
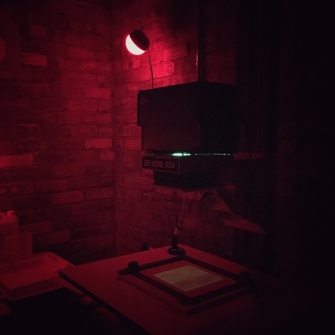
Towards Ben Lomond, Lith print, September 2016. Hasselblad 503cx, 80mm, Ilford HP5, Fotospeed LD20
The last week has been spent mainly researching and printing using Lith chemicals and paper. When experimenting with a new or unfamiliar technique some investigation into best / preferred working methods is required. In the absence of a master printer some hours of internet searches were required and yielded useful information which eventually brought me to what I thought was a good initial understanding. With the right lithable paper and recommended chemicals purchased I attempted my first Lith printing session. I’m happy to admit that this was an unmitigated disaster with very poor and confusing results. The test strips looked fairly promising but by the time I had taken the plunge and began to make a print it became very obvious that all was not well. I was aware that development times would be intentionally long and I really persevered, but wasn’t prepared for the seasons to change as I patiently agitated away and away… Eventually the dev tray presented a demoralising selection of high contrast and mottled sheets of expensive paper. Before I abandoned the darkroom in a mild depression I kept back the exhausted chemical ‘old brown’ in an airtight container, a small amount of which would be added to the fresh developer in the next session. The older chemical helps to speed up the point at which ‘Infectious’ development takes place – apparently.
I knew that I had the right developer Fotospeed LD20 and paper that would accept the lith process, the culprit in the darkroom (apart from me) and the reason for the disappointing earlier results had to be the chemical dilution. Fotospeed dev comes with a printed sheet explaining the process in detail but the recommended dilutions just weren’t providing the results. Fotospeed suggests a dilution of 15ml-Part A to 485ml water and 15ml-Part B to 485ml water to make the working solution – I wasn’t prepared to try such a weak solution again. After further forum reading, the dev dilution of 1-9 was repeatedly recommended as a good starting point.
I mixed up the fresh dev and added a small amount of the ‘old brown’. The temperature was just over 20 degrees. The first test strips came up a little too quickly but looked really promising – my theory on the weak dilution had been correct. I added a further dilution 500ml of water to the tray and the dev time increased to where it needed to be at around 6 – 7 minutes. The first print was fairly straight but simply needed longer in the dev, and by the second print I held on for the infamous ‘Infectious’ development to really take hold and then snatch the print. By the fourth print I had stopped the aperture down one stop and dramatically doubled the exposure time. The new dilution certainly had the effect that I had been hoping for with deep blacks and plenty of detail in the highlights. The Foma ‘Chamois’ paper gives an attractive creamy finish, and I see no need for additional toning, although this is still an area of processing to be explored.
The whole process of Lith printing is an exciting and real darkroom challenge, as you have to throw out your conventional printing rules. No two prints are alike and the technique is a variable one of experimentation, and ‘feel’, working with the chemical, temperature and exposure times to control the print. Blacks development, highlights exposure. I think I’ve got it now. I’m also keeping darkroom notes per print so if you would like any information on the dilutions and test strip exposures that I worked with please just message me. I shall be posting more lith prints here soon.
